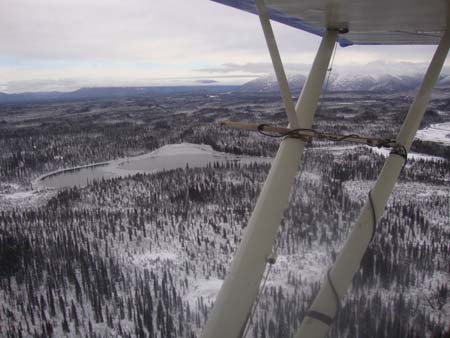
 As I am flying in the Super Cub from Tok into the wilderness of Alaska, I looked down below me and it was as if I was traveling in a time capsule. Taking me back hundreds of years before tv’s, the internet and Facebook was created. Alaska calls itself “The Last Frontier” and for good reason. When you are taken into the wilderness of Alaska, it’s like turning back time.
When my Alaska Bush plane circled around what looked like to be a cleared off gravel bar, I knew we must be there. The big bouncy wheels touched down and we bounced our way to a stop before running into the birch trees that were at the end of the makeshift runway. I stepped out of the plane and realized I was in a place that very few other humans have ever been. This was going to be home for the next 10 days.
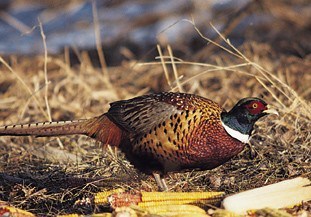
There is no other place I would rather be in the fall than hunting whitetails or quail and pheasants in Illinois but each year I like to take a hunting trip in September before our season starts. I love to hunt so the trips are fun, but it also lets me be in the hunter’s shoes and gives me a better feeling of how our hunters feel when they hunt with us. Each time I return from a hunting trip I feel that I can relate to our hunters a little better.
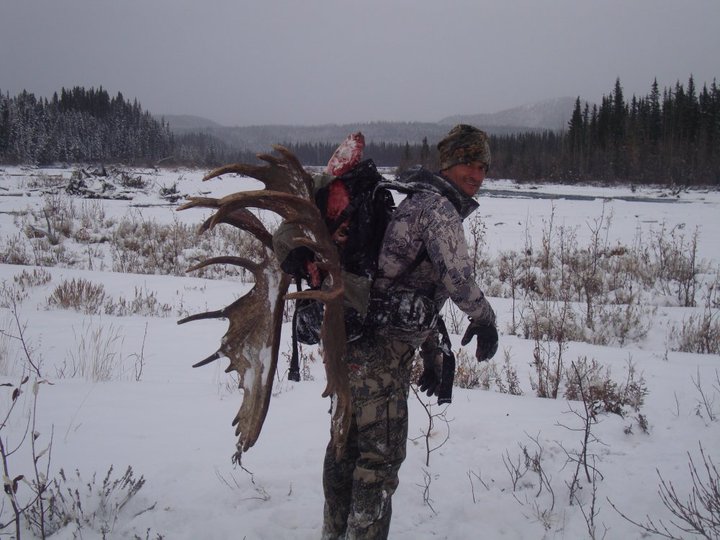
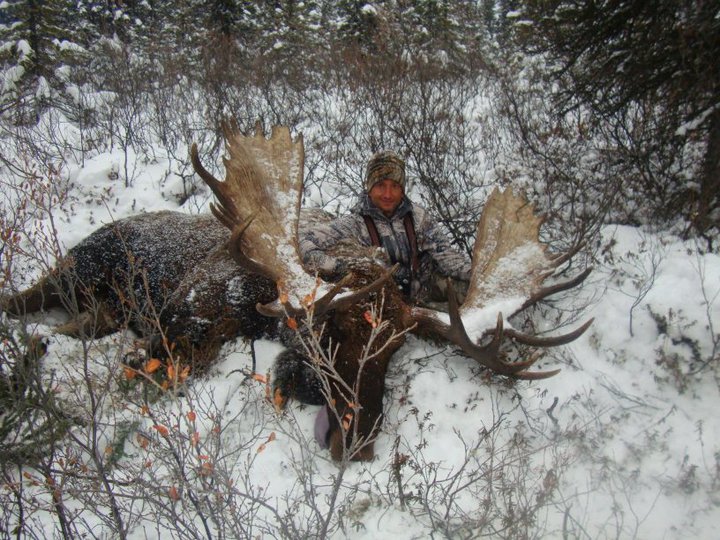
I have been blessed to hunt moose in Alaska twice in the past three years. Each time I make a list of what to do to ensure I am better prepared for my next trip into the Alaska wilderness. Alaska is very unforgiving and the littlest things can become big things. I am also an archery hunter, adding to the list of things that could go wrong. (Rifle hunters will also find this blog useful.) I have been asked by several friends and hunters of mine to send them my “Alaska List.” For many, hunting Alaska may be a once in a lifetime experience so you want to make sure you do everything possible the first time to make your experience a positive one. So I have taken two years of experience and put together what I feel like is a good “Alaska List” so you can better enjoy your first Alaska fly-in hunt.
There is a lot of good information here. Click on the links below for more information.
Travel Plans>>
Things You Must Do to Be Successful>>
Gear For an Alaskan Fly-In Hunt>>
Archery Equipment>>
Safety & Survival Supplies>>
Self Guided Alaska Hunting Tips>>
Miscellaneous & Optional Things to Bring>>
Fairbanks Information>>
The information below is for 90% of hunters who have yet to experience Alaska and are starting from scratch. For those 10% that live the Alaskan dream, please feel free to give your input, both positive and negative at the bottom of this blog. I want this to be a useful resource that hunters can use so the more input from experienced guides and hunters, the better. This information is for the hunter who is using an outfitter or a self-guided hunt with the aid of an outfitter to supply all basics needed when doing a fly-in hunt in Alaska (tents, food, first aid, etc.). Also ,make sure you check with your outfitter and see what he recommends. Different times and areas of Alaska may require specific gear. I based my list on hunting mid to late September for moose. This list could be used and tweaked for caribou and other animals. Lastly, I want to say that I am not sponsored by any of the following products I recommend. I provide a link to their web sites just so it’s easier for you to do your own research. I am not saying these are absolutes either; you may be able to find substitutes for less money or even something better. But I can tell you that I feel dialed in and have confidence in my gear list. Most bush planes will only allow you to bring 50 lbs. of gear, not counting your weapon, so you have to plan ahead and make sure every ounce counts.
Travel Plans
When you are planning a hunting trip of a lifetime, make sure you allow an extra day or two on the front and back end of your trip. Getting to Alaska takes a full day and normally several stops and plane changes. When I am going to Alaska I like a long time between connections. You want to make sure you make the next plane along with all your gear. I like 2 hrs. or more between flights if possible. Adding an extra night and day is going to cost you little compared to the overall costs. On the way back, you never know what the weather is going to do in Alaska, so allow a day or two in case you can’t fly out of the bush. If everything runs smoothly, this gives some extra time to do some sightseeing. Alaska Airlines seems to be the logical airline to use. They offer a media player for $8 or $10 (depending on length of flight) that is well worth it. The player has many movies, tv shows, and games to keep you entertained on the long flight there. At the time of this blog, Alaska Airlines charged $20 for extra baggage. Another option is to ship some of your gear home but it will be more expensive. If you want to take meat home the cheapest way is to take it with you on the plane and ship some of your gear home. You may also want to talk to your outfitter about shipping some things in advance so it does not take up so much room (sleeping bag, etc.).
Things You Must Do To Be Successful in Alaska
 Get in shape! – It amazes me how many people I have met who are not in shape for Alaska. Make it your goal to be in the best shape of your life. My goal is always to be in as good as shape as my guide. I don’t want to be the one that holds me back. Being in good shape WILL increase your odds for success.
When getting in shape for your hunt, train with the same equipment and gear that you will be using in Alaska. Running on a treadmill for 30-60 minutes is fine, but you also need to walk up and down some big hills with a pack with 30+ lbs. in it and with your boots on. Don’t wait until you get to Alaska to break in your boots! You could be walking 4-10 miles a day with your gear and pack on your back. Make sure you train for it!
Shooting – Practice shooting with your clothes and gear on. It does not do a lot of good to shoot your bow in shorts and a t-shirt only to be shooting in Alaska with gloves and a heavy coat on.
Make sure you practice shooting your bow with gloves on. I know it’s hard to do in July when its 95 degrees out, but you will thank me when you are 30 yds. from a monster moose and it’s snowing. I like to wear a liner glove and a mid-weight glove (see below in gear list). This gives me a lot of versatility. I practice all summer wearing no gloves, just the liner and both the liner and mid-weight glove. I have confidence in all three scenarios going into my hunt. If you are like me, the mental battle is 90% of it and you want to cover every scenario possible before leaving for your trip.
Shoot your bow with your quiver on. This was a big mistake I made on my first archery moose hunt, but I didn’t make the same mistake twice. Being an avid whitetail hunter, I have always taken my quiver off when I am in the stand. I got by with this on several elk hunts but not in the elements of Alaska. You want to eliminate any unnecessary steps that you can and taking your quiver off is one of them.
Practice close shots. Alaska is thick and the chances of taking a shot at a moose over 40 yds. is slim. Your odds are better of taking a shot at 25 yds. or less than it is over 25 yds. so practice close shots.
Use an animal target (deer, elk, etc.). Shooting a block target is good for getting your bow sighted in, but months before your hunt switch over to an animal target. In my opinion, it is one step closer to the real thing and can be a mental edge.
Gear for an Alaska Hunt
 Clothes – Having the right clothing is very important. The struggle is that it can be 75 degrees one day, raining the next and snowing with wind chills below freezing a day or two later. Having the right gear is important and when you are limited to 50 lbs. of total weight, it makes it even more challenging. (50 lbs. is the maximum most charter plane companies will allow.)
Sitka Clothing – I looked like the Sitka poster child when I stepped off the bush plane. I was “all in” with Sitka clothing and gear. With a name like Sitka, how could I go wrong, right? I can say I didn’t have any regrets and changed little from my first hunt to my second. The great thing about Sitka gear is its versatility. I was equipped to handle the 75–degree day and the 10-degree day all with the layering system they provide. Sitka has a Core (base) layer, a Traverse (mid) layer and an Outer layer. These three layers would get me through all the different scenarios I would encounter. For example, it may be 30 degrees when we leave camp, but I have to hike two miles to the base of our glassing mountain then another ¼ mile up the mountain. What started out cold quickly turned into sweat and heat. Then mid-day we would leave the mountain and it could be 60 degrees and sunny, only to cool down before the sun went down. The feature that makes it all work is the zippers each layer has. You can zip down or up to allow more or less ventilation. I was adjusting on the fly. I carried a backpack to take off and add layers as needed. I am a huge fan of wearing a vest. I used Sitka’s Kelvin vest everyday in Alaska. It keeps your core warm but also gives you the flexibility with your arms. Lastly, when I knew we would be glassing on top of the mountain, I would pack my lightweight Kelvin pants and coat. They are so light you don’t know they are there but are very warm to put over the top of your other clothes. Here is my Sitka clothing list:
______Two base layer pants and shirts
______Two Traverse pants and shirts
______Two pairs of 90-degree pants with suspenders
______One 90-degree coat
______One Kelvin vest
______One pair of Kelvin pants and coat
Having two pairs of pants is important as they get wet crossing streams and you need them to dry out. I also like two pairs of base and traverse layers so they can also dry out.
Boots – I wore Kenetrek Mountain Boots both trips and I could not be any happier. The first year I didn’t seal them and never wore gaters, and my feet never got wet. This last trip I did seal them and had gaters on and never felt a drop. Make sure you purchase boot wax to treat your boots though!
Rain Gear – Good rain gear is a must in Alaska. I am not sure you could find better rain gear than Sitka’s.
Gloves – I used an Under Armour liner glove along with Stika’s Jetstream glove. I loved the combination. For extreme weather when glassing I brought along Sitka’s Stormfront glove. These gloves are warm and waterproof.
Beanie/Stocking Hats – I liked having two hats. I had a heavier one for cold weather and a lighter on for warmer, but not hot, weather.
Socks – I purchased the Kenetrek Liner socks and Alaska sock. Based on an 8-day hunt, I would recommend bringing eight pairs of liner socks and four outer socks. If you can afford the weight then bring eight pairs of each. If you are over on weight, just bring four pairs of each. Make sure when you order to get over the calf or boot high socks. If you are not use to over the calf socks, they may not be comfortable to you. The liner sock will not only help keep you warm but will also help prevent blisters.
Gaiters – I used Sitka gaiters and they worked great. All the guides swore by Outdoor Research gaiters and they seemed to work well too.
Wiggys – These lightweight portable waders are a must when crossing the many streams you will encounter. Wiggys
Pack – For a moose hunt, Sitka’s Bivy pack was the perfect size for me.
 Camp Shoes – I like flip-flops. They are easy to get in and out of. Also, they are light for weight.
Camp Clothes – I wore my Sitka Kelvin pants and coat in camp.
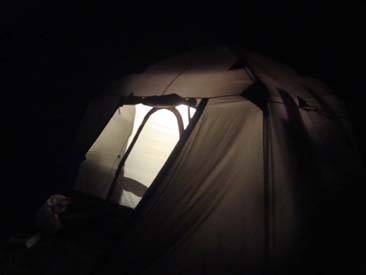
Sleeping Bag – I purchased a Wiggy “Two Bag Sleeping” system and could not have been more pleased. In fact, I think I slept better in it than I do at home in my own bed. Sleeping in tents in below freezing weather does not sound like fun, but if you are in a Wiggy Sleeping bag, you will be toasty all night. The only disadvantage of the Wiggy Sleeping bag is the weight. But in my opinion it’s well worth it. Regardless of the brand, purchase a synthetic sleeping bag. If they get wet, they will dry out.
NO DOWN! – (goose down) don’t use anything with down in it. (Cloths, sleeping bag, etc.) When down gets wet it has no insulating qualities. Everything gets wet in Alaska!
Thermarest – These are great to have if you are going to be sleeping on the ground. Some outfitters have cots in the tents. If so this may be something you can leave behind to help save on weight. Thermarest
Other Gear
Binoculars – I used Swarovski.
Binocular Chest Strap – I used one from Dead Down Wind.
Ankle-fit hip boots – Many guides prefer these types of boots instead of using Wiggys. Hang them upside down in camp to dry.
Headlamp – Great in the field and in camp. Also acts as a reading light. I purchased Cabela’s Alaskan Guide headlamp.
Two Water Bottles – Nalgene one liter big mouth bottle. (Measurements on it can come in handy.)
Zip Lock Bags – Put all clothes and gear in a zip lock bag.
Towel, Light-Weight – In two years I have yet to take mine out. Next time it won’t make the trip.
Knife – With a 5-inch straight blade. Havalon knives are perfect for skinning.
Rangefinder and Spare Batteries – If archery hunting, make sure you use one without any zoom. It’s way too thick to have any magnification on your rangefinder. You won’t be able to see landmarks. I used a Nikon rangefinder.
Rangefinder Tether – This tool is a must! I clipped it on my pocket zipper and could point, click and drop in seconds. Purchase with your rangefinder from Nikon.
Camp Cup – This may sound trivial but a good cup in camp is a nice thing to have.
Camp Spoon/Fork – Again it may sound trivial but important. (They make a plastic one that is a spoon on one end and fork on the other.)
Thermometer – It’s nice to know the temperature.
Alarm – You don’t want to oversleep, every hunt is important. My Ironman watch never let me down.
GPS and Spare Batteries – Mark camp and also points along the way. Remember to mark where you shot your moose. I used the Garmin eTrex Venture HC
Camera with Spare Batteries
Archery Equipment
 I changed my entire bow set up from the first hunt to my second hunt. It was time for a new bow so I set up my new bow to handle the Alaska wilderness. My first trip, I had two site pins bent, six fiber optics on my pins broke, my release came apart and was lost, and my rubber string nocks slid two inches without me knowing it. But my second bow and set up was perfect for Alaska.
Bow – I bought the Helim from Mathews. It is lightweight and its incredible accuracy made it a perfect choice.
Single Pin Sight – I switched from a 5-pin sight to a single pin adjustable sight. Not only did this take out some “thinking”, it also was built to endure the Alaska environment. The pin itself is made out of steel and it would be almost impossible to bend the pin or break the fiber optics without something major happening to the entire bow. I left the pin on 25 yds. and felt very comfortable from 0-35 yds. without moving it. I had decided that 40 yds. or over was going to be the distance I would move the pin if needed. But I doubt I would take a shot further than 40 yds. so it wouldn’t have made a difference. But for those that want to be able to take longer shots, a fixed single pin sight (at 25 yds.) with an adjustable second pin set at 45 yds. would not be a bad set up. My single pin sight is from HHA Sports.
Shoot a Loop – The first year my bow was set up with rubber string nocks (where I knocked my release.) After having them slide on me without me knowing it, I switched over to a loop. You want to eliminate anything that could go wrong.
Whisker Basket Rest – I switched from a drop away rest to a whisker basket. To be honest I was very hesitant to make the switch. Something about anything touching my arrow made me nervous. But I can tell you now, it was one of the best changes I made. Not only was my bow very accurate, I could put an arrow on my rest and forget about it. In the thick brush of Alaska and when stalking moose, this eliminated the concern of my arrow falling off my rest. My rest is from Trophy Ridge.
Stabilizer – Again you have to think of every detail. I went with the shortest stabilizer I could find but that was still useful. This helped out a bunch when walking through the thick brush. My stabilizer is from Axion Archery.
Broadheads – This really became a mental game for me. I have hunted whitetails for 30+ years. Most of those years, I spent numbering my arrows, practicing with my broadheads, and re-sharpening them before hunting. They are so sharp you could shave with them if you wanted. My favorite arrow would be the first in my quiver, my next favorite my second, etc. This always gave me extreme confidence when drawing back on that animal. On my first moose hunt, I bought into the “go heavy or go home” mentality and used broadheads that I never used and couldn’t sharpen. So I didn’t practice with the ones I would be hunting with (besides one or two shots.) My confidence level was not 100%. So this time I went back to my favorite broadheads, Wac’em, and numbered my arrows. This is a personal choice and many like the heavier non-sharpening broadheads. Whatever you are comfortable with, stay with it. I recommend, though, a cut on contact broadhead (no expandables). If you have a sharp 100-grain broadhead, I have all the confidence in the world you can pass through a moose if you hit him right.
Arrows and Fletching – I always shot feathers until my first trip to Alaska. This is one change I didn’t regret. With the weather conditions being unpredictable, having veins was one less worry.
Sight Cover – Even with a durable site, I would still use a site cover. I added this on my second trip and it gave me the reassurance when traveling through the brush. I found mine at Cabela’s. Anything with a pull string that covers the site will work.
Bow Sling – I have used the Primos Bow Sling and love it. But I have noticed on my shorter cam bow it does come off more often than when I had a longer cam bow. The sling helps when carrying the bow and also protects your bow string.
Extra Archery Tools That May be Needed:
Extra fiber optics
Allen wrenches
Bow string wax
Extra release
Extra rubber for peep site
If feasible take along either spare limbs (if recurve hunting) or a spare bow. If something breaks, you can’t run down to the store for another.
Safety & Survival
Ask your outfitter what will be supplied in the way of safety tools and supplies. The first year I brought a lot of survival equipment, not to ever bring it out of the packet. (The outfitter also had the same equipment.) The second trip I purchased a small first aid kit only to donate it to base camp. This is something that you don’t want to go without but if your outfitter supplies everything, there is no need for the extra weight.
 Lighter
Waterproof Matches
Magnesium Fire Starter
Water Purification Tablets
Nu-Skin for Blisters
Non-drowsy Dramamine – This can be a life saver!
Space Blanket
Spare Batteries for All (Headlamp, rangefinders, cameras, etc.)
Band-Aids
Athletic Tape
Lip Balm
Alcohol Wipes
Ibuprofen – This can make your hunt. If you have any aches make sure to pack this.
Tylenol PM
Tums
Roll of Twine
Duct Tape
Glow Sticks
Spare Zip Lock Bags
Extra week’s worth of prescription meds in case of crappy weather.
Self Guided Alaska Hunting Tips
Never hunt alone – Even bowhunters should have a pal behind them with a rifle. You should have nothing less than a .30-06. Don’t go further than the outhouse (If there is one) without a rifle.
Bears – If you have to shoot a bear, black or grizzly, shoot for bones, spine and shoulder. A heart-shot grizzly can run a half mile. Never underestimate a black bear, especially his speed. They weigh 300 plus pounds, have teeth and claws, aren’t really friendly, and can outrun a race horse.
Spotting scope – You will need one to find and judge moose. Remember that from the center of a moose’s head to ear tip is about 18 inches. Good rule of thumb in judging antler width. If he can scratch his butt by turning his head, go get him!
Size of animal – Alaska has laws on how wide a moose antlers can be, how much curl a ram can have, along with many othe laws. Make sure you know them before your trip. Even if you have a guide its good to know and understand the laws before your hunt.
Hunting moose – hunting method – Find a good glassing area that covers a lot of terrain. If you find a good moose wait until he beds down then go after him. Most of the time they will stay bedded down until late afternoon.
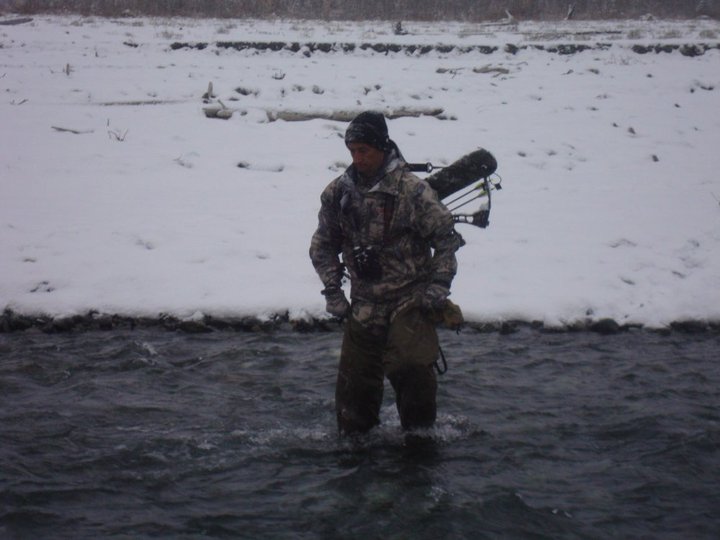
Crossing creeks – pick a long stick to probe ahead of you and sidestep across, always facing upstream. The creeks are fast and cold. Never walk straight across or allow your legs to cross each other.
Look behind you – often – when you leave camp. Remember that compasses point somewhere east, the sun doesn’t come up in the east and set in the west, the North Star is directly overhead, and moss grows wherever it feels like growing. So look back down the way you came so you can find your way back to camp later. A GPS unit helps too!
After the kill – make sure its dead by touching the eye with a long stick. If there is any life left they will blink.
Meat rack – make sure your meat rack is well away from your tent. Give yourself enough room that if you hear the meat swinging you can still stick your rifle out of the tent and shoot into the sky, so the bear will leave.
Miscellaneous – Optional
Book to read – I recommend Raven’s Pray by Slim Randles.
Hand and toe warmers
Pistol – Both years I have not had a pistol. But I am considering purchasing a 40 or 45. If nothing else, it may make you feel a little safer in the tent.
Target in camp – for archery practice.
Decoy – Moose-like to hang up about 60-80 yds. out. Using a Montana Moose Decoy may bring them right in.
Second pair of boots – If conditions are extreme and your boots get wet and freeze, a dry pair of second boots can be a life saver.
Waders – Some areas require waders. Ask your outfitter.
Satellite phone – If doing a self-guided hunt this is well worth the investment. If hunting with a guide, ask if he will have one in camp.
Contacts – If you wear contacts purchase the kind you can wear for one month. This way you are not taking contacts in and out. Bring a couple back up pairs just in case. Throw in your glasses as a last resort.
Leatherman – These are great tools but weigh a lot. See if your guide is going to have one. If you are doing the self -guided hunt, just one of the hunters in your group needs to pack one.
Nutrition – Most hunters won’t be thinking of this but it can make the difference of being ready or fatigued on the last day of your hunt. Make sure you eat and hydrate well. Peanut butter is in most camps and is a great recovery food. Also pack some energy gels to give you the extra boost during the mid-day. High calorie energy bars are also good.
Arrow tube – I put all my extra arrows in an arrow tube.
Extra Broadheads – Bring an extra package or two.
Guide – Make your guide your best friend whether you like him or not. He deals with a lot of hunters and many times they are not pleasant. He is your key to success and at this point you have no choice. The more he likes you the more he is going to enjoy the hunt and will give you that extra effort. I was very lucky to like my guide on both moose hunts.
Outfitter – Make sure you understand everything in your contract. You can’t hunt on the day you fly in and out (Alaska law) so make sure you know the exact amount of hunting days (not including flights.) If bad weather moves in and you can’t fly in, know how this will be handled. Most outfitters do not refund money if you miss days because of weather.
Trip Insurance – I strongly recommend you purchase travel insurance.
Fairbanks & Tok Alasaka
If your trip takes you through Fairbanks or Tok, Alaska, the following will make your trip more enjoyable:
Hotel – Pike’s Waterfront Lodge is the place to stay. Ask for the hunter’s special rate. For $5 per person they have a shuttle that will take you anywhere in Fairbanks.
If you would like information on the Alaska outfitter I used, please e-mail me your full name, address, and phone number to Gary@Heartlandlodge.com. I will forward it to my outfitter. If you would like information on our whitetail hunts, pheasant and quail hunts or turkey hunts, I would be happy to help you.
Gary Harpole
Gary,
Great information! I think you’ve got it pretty well covered Gary. I just followed a very similar list of “do’s and don’ts” from Gary on my first Alaskan experience. Although the my Outfitter gave me a good starting list, Gary’s list is a must if you want to make your trip as enjoyable as mine. I was also successful in bringing home my first Yukon Bull. Thanks Gary!
Excellent advice for hunters headed to Alaska. Please remember that it’s shot placement that counts and not the horsepower of the cartridge.
Practice shooting (bow or rifle) at a six-inch paper plate at different distances and different positions. Then only shoot when you know you can hit that spot on game.
Slim Randles
former Alaska guide
I would love to hunt up there!
I live and hunt/fish in Alaska. You’ve put together a good article. I also bow hunt, and we can’t stress it enough, read the regs. Some areas are “certified bow hunters only”. Not a tough class but required. Hope your in good shape and have good gear because Alaska will test it. Also need to know “where” your hunting, if your doing a DYI- you do not want to accidentally end up on Native land, and it’s easy to do
I am interested to learn more about the hunting in Alaska,
someone on my friends list on FB posted your article here and the first thing I saw was “As I am flying in the Super Cub from Tok into the wilderness of Alaska…” I was immediately attracted to the rest of the story.
You see.. Tok was my life for over 48 yrs….. my roots..my home.. and family and friends are still there.
I live in VA at the moment but hope someday to be able to move back home where I have a very modest and humble home 4 miles out town. I am wondering if you were flying 40 Mile Air? If so…I grew up with the original owners… knew their mother well and actually worked at the office one summer. I worked at Fast Eddys across the highway as well as Janitor.
So it was a nice balm to hear the name of TOK on the blog here..thank you for bringing my home close to my heart this morning!!
Thank you for your post Kathy! Tok is a beuatiful area! Yes, I flew 40 Mile Air. I also ate at Fast Eddys as well and stayed in the rooms right behind the resturant. I really enjoyed Fast Eddys. I am going to add them to the blog above when I get a minute. Thank you adding your input to the blog!
Great advice and blog Gary! Never underestimate the value of proper hunt planning. Especially when doing a trip such as an Alaskan adventure. When you are in Alaska things can go wrong in the blink of an eye…you need to be prepared.
Just wanted to let you know that someone posted the article you did on preparing for Alaska on your website and attached it to our “Forum” here at Sportsman’s News. It was well received and had many comments on it. I took the time to read your article since my staff spoke so highly about it. My hat is off to you and I must say that you have written the most thorough and detailed article on traveling to Alaska and being prepared that I have had the pleasure of reading. I’ve been going there for 25 years and consider myself extremely knowledgeable about the entire state and all species. I’ve even guided this country numerous times. Just wanted to tell you great job and I hope you and your mom are doing well.
This is one of the best blogs I have read on hunting a guided or outfitted hunt in Alaska. I am an Alaska resident and I do a number of remote DIY hunts. I would only add a couple of small suggestions for these types of hunts. But! For a true DIY hunt I would either recommend that people use a hunt planner, add a bunch of detail or suggest that they do a bit more research.
General:
Safety:
Gear:
Hi Gary,
Very useful informations. I wonder how much this hunting trip cost and are you going this year-2018? I’m from Chicago and thinking doing the Alaska hunt if I can find company, certainly will not go alone. Thank you.
Hello Vlada, I’m glad you enjoyed the blog! I’m not going this year but plan to again one day. A DIY hunt could cost as little as $4,000 and a guided hunt can range up to $25,000.
This is one of the best blogs I have read on hunting a guided or outfitted hunt in Alaska. Thanks for sharing!!!